Recently, I read Alan Turing: The Enigma – a Turing biography by Andrew Hodges. While his whole life was pretty remarkable, one of the most important parts was his cryptanalysis work at Bletchley Park trying to crack the Enigma code.
In the book, there is a fair amount of detail about how the Enigma machines work. However, reading descriptions didn’t really help me understand the workings, so, because I like wasting my precious little free time, I thought I’d try to write a simulator using Javascript.

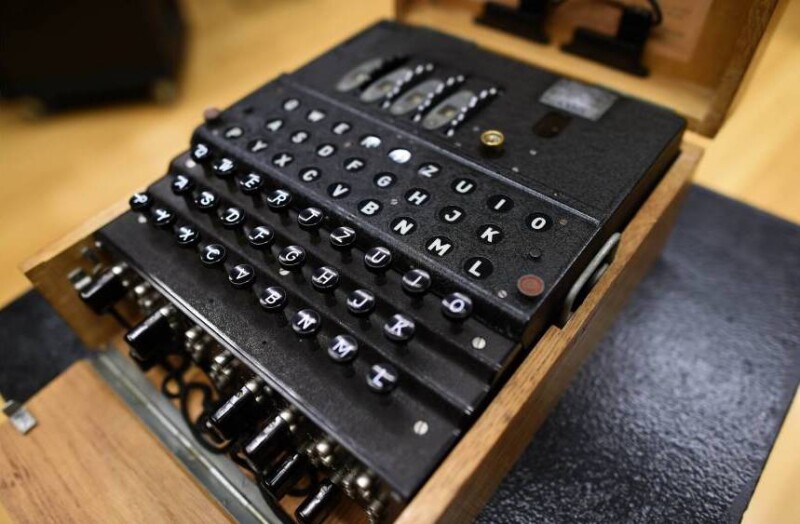
A bit of explanation: Enigma machines were used by the German armed forces to encrypt and decrypt their messages throughout World War 2. They look like this, which you might have seen already if you’ve watched The Imitation Game.

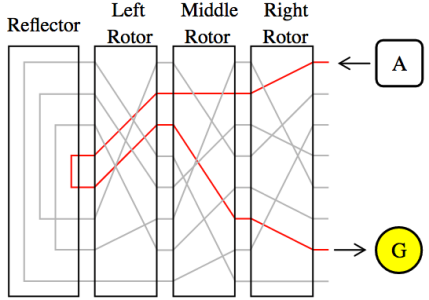
You’d configure the machine by turning the dials (rotors) at the top to the day’s code book settings and then start typing on the typewriter. When you hit a key, one of the letters above the typewriter keys would light up showing what that character is getting encrypted or decrypted to. It’s a simple electrical circuit that lights up a lamp but the path gets scrambled as the electrical signal passes through the rotors. Each rotor randomly connects an input letter to an output letter.

So the trick to the machines is that every time you hit a key, the rotors would shift (rotor stepping). The rightmost one would turn every key press and the others would click over every full revolution of the rotor on their right (think of a car’s odometer).
Once you’ve got your encrypted message you can send it over the radio to your buddy in a U-boat and he can rerun the process on the encrypted text, recreating the original message. The number of combinations that could be used in configuring the Enigma is so great that it would have been impossible to crack with any means available at the time – that is, even after understanding how the machine works and exploiting its flaws. However, due to mistakes machine operators made and slack operating procedures, messages were routinely broken throughout the war. Despite knowing that information was being leaked, German High Command put it down to more traditional means (spying). They considered the code unbreakable.
The Javascript Simulator
So, when simulating it, I first had to find the wiring for the rotors in the machines – lucky for me there is a lot of detail on the subject. I soon had some code for a rotor that could perform letter substitution for each of the rotor types, however the devil is in the detail and this is why building a simulator rather than reading about them helps to understand how they work.
In addition to the current position of the rotor (the Grundstellung or Ground Setting) there are a few more ways to increase the randomness of the system:
- Wiring in the rotor can be offset (Ringstellung or Ring Setting).
- The rotors can be removed and placed in different orders (Walzenlage or Wheel Order).
- The reflector can be changed (Umkehrwalze or Reflector Wheel).
- A plug board (Steckerbrett) can be used to perform another layer of letter substitution (Steckerverbindungen or Plug Connections).
Also the rotor stepping has some quirks (steps before substitution, turnover notch location(s), double-stepping, thin rotors). The ring settings and double stepping, in particular, took me a while to wrap my head around.
So, eventually I got it working reliably, with lots of testing against Louise Dade's existing simulator. To get a flavour for the code here’s the function to read a letter in the machine and returning the substituted value.
read: function (l) {

  // Stepping levers move, moving rotors as needed.

  for (var i = 0; i < _rotors.length; i += 1) {

    if (

      i === (_rotors.length - 1) || // "fast" rotor always steps.

      _rotors[i + 1].inNotchPosition() || // rotor to the right is notched.

      (_rotors[i].inNotchPosition() && i !== 0) // rotor is in notched position and it's not the "slow" rotor.

    ) {

      _rotors[i].incrementPosition();

    }

  }


  // Takes the input letter, convert it into a number and run it through

  // the plugboard, each rotor from right to left, through the reflector,

  // and then back through the rotors left to right, and finally back

  // through the plugboard. Convert it back to a letter and return.

  var n = enigma.util.letterToPosition(l);


  var o = _plugboard.read(n);

  o = _.reduceRight(_allRotors, function (input, rotor) {

    var output = rotor.forwardRead(input);

    return output;

  }, o);

  o = _reflector.read(o);

  o = _.reduce(_allRotors, function (input, rotor) {

    var output = rotor.reverseRead(input);

    return output;

  }, o);

  o = _plugboard.read(o);


  return enigma.util.positionToLetter(o);

},
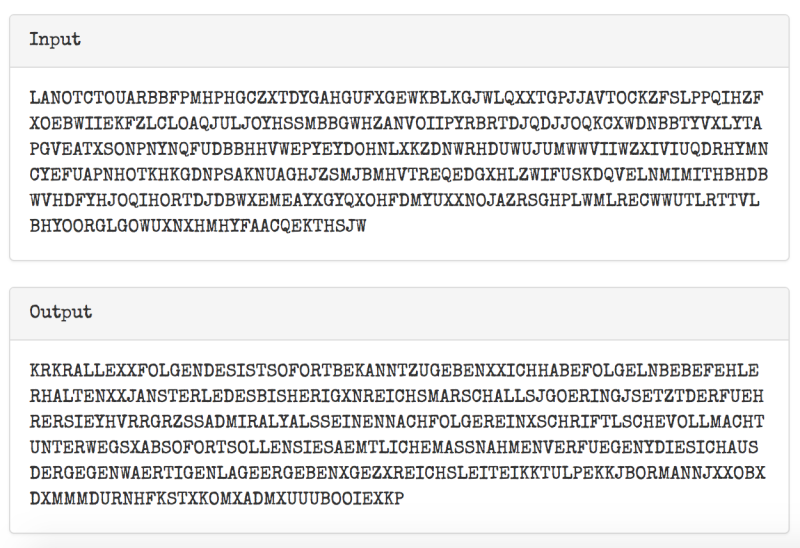
So let’s see if it works! This is an actual Enigma message from WW2 run through the simulator.

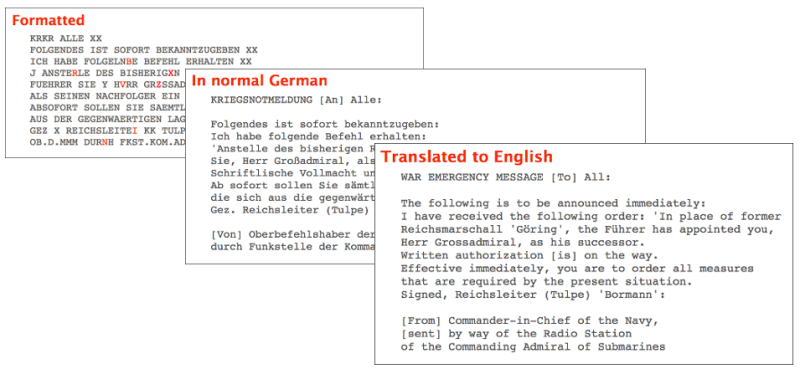
So despite it looking like gibberish, this is the actual decryption. It’s hard to read because a) the Enigma doesn’t support punctuation or numbers, b) there are lots of abbreviations and shorthand, c) has a few typos, and d) it is in German. Conveniently, the site that provided the message also shows how it can be formatted into readable German and provides a translation.

Anyway, I’ve embraced my inner-geek and now know more than will ever be useful on how an Enigma machine works. My original idea was to build upon this and construct an interface using SVG that will allow you to see the machine and visualise the substitutions. I’m still keen to do this but for now it’s a hacked together jQuery/Bootstrap UI. Another idea is to try and build a simulator for the Bombe that Alan designed to crack the Enigma messages.
Try it out at here
Umkehrwalze: C
Walzenlage: β III I IV
Ringstellung: L T A G
Grundstellung: X O K L
Stekkerbrett: DY, LG, PB
LARBDFZKXTFQZJGUSDSAYN
Find the code here
Banner image: Photo by Thomas Stephan on Unsplash


